Home / User Guide / How To Use Photos Exif Editor / Configure Output Settings
Configure Output Settings
Photos Exif Editor also allows you to customize how and where your edited photos are saved. From file naming formats to location tagging, you can control everything as per your preference. Follow the steps below to set up output options before saving files.
Note: Not all options are visible at once. You may need to scroll down in the Output Settings window to view all available features.
-
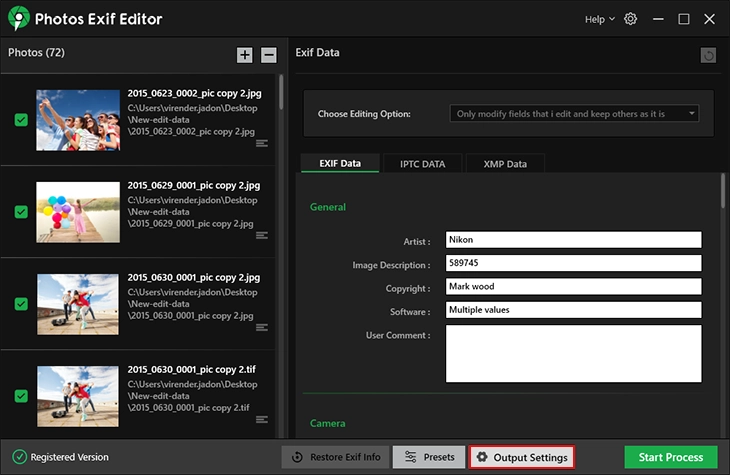
After editing metadata, click the Output Settings button in the bottom-right panel of the main screen.
-
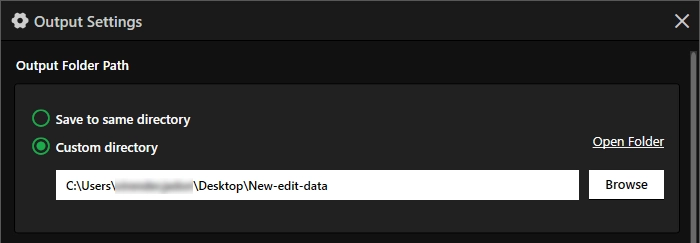
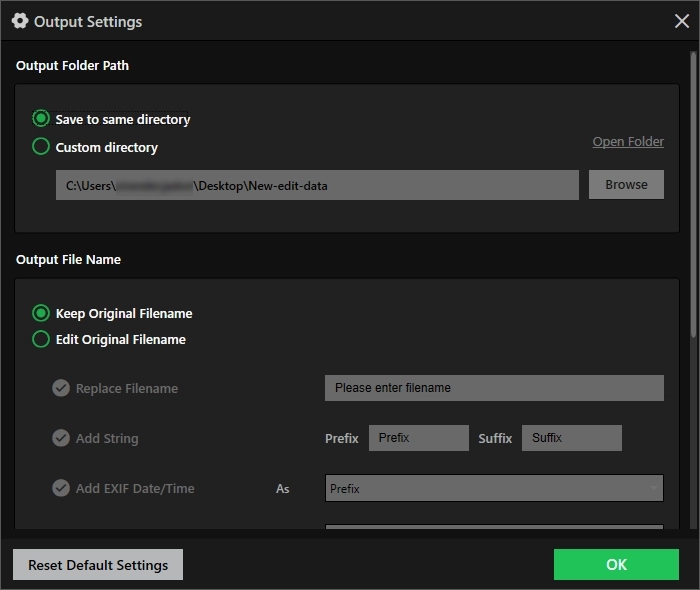
Select the folder under the Output Folder Path section where you want to save the edited images -
- Save to same directory - Saves files in the original folder.
- Custom directory -Choose a different folder by clicking Browse.
-
Decide how the filename should appear. You can select from the options -
Keep Original Filename -Leaves filenames unchanged.
-
Edit Original Filename -This option allows you to:
- Replace the file name
- Add a Prefix or Suffix
- Insert EXIF Date/Time as prefix/suffix
- Format the date using multiple options (e.g., DDMMYYYY)
- Add EXIF Location by changing city, state, or country details.
- Add Width x Height to automatically add image dimensions to the filename.
Additionally, you can choose whether to retain the Original Date/Time, Creation Time, or Modify Date. To do so, select the option Add EXIF Date/Time > click the down arrow next to Type and select from the list of options.
Tip: If you use the Edit Original Filename option to make changes, enable each field to customize the changes.
Once all changes are made, click OK to apply your output preferences.
Tip: You can revert these settings at any time by clicking the Reset Default Settings button.